Photoshop Tips and Tricks #5: Turning Photos into Line Art
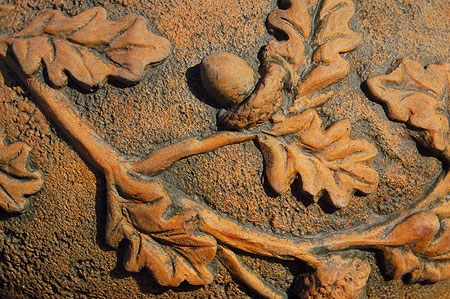
Want to look like a pen and ink wizard of an artist? Okay, this one’s for you. Here is our “Before” shot, a photo I took at some landscaping shop:
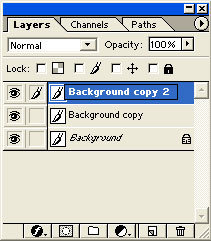
First, we will duplicate the image to another layer above it, like so:
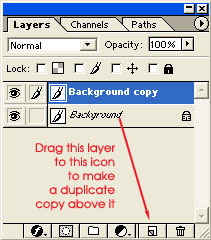
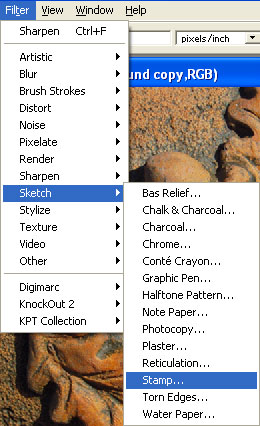
Make sure you’re working on the top layer before proceeding, and make sure you have the foreground and background colors set to the default black and white (hit the D key if they aren’t). We’ll be using Photoshop’s Stamp filter, but I have to tell you that the filter works like crap on its own. The best you can hope for is a mess of blob-like black shapes, which really don’t look like much. So … step two will help make Stamp work so much better for you. What do we do? We increase the resolution, like so:
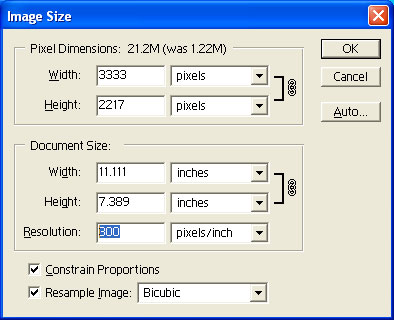
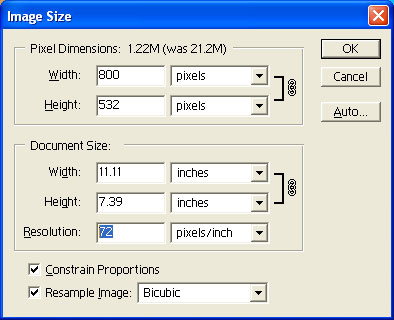
In other words, go to Image > Image Size, and if your resolution is something like 72, increase it to 300. If it’s 300, increase it from that number to something even bigger. The exact number isn’t important. The point is to make your image much bigger than it originally is.
Okay. Got that? Good. Now do this:
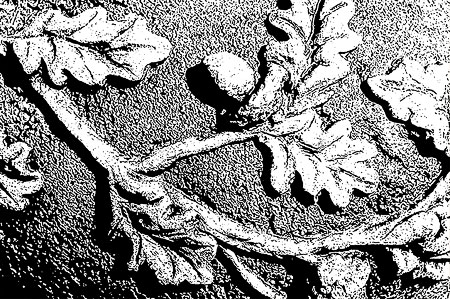
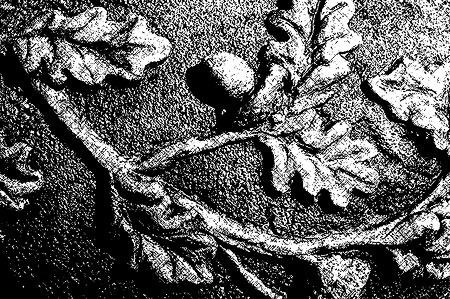
And tweak your settings so that the areas you want to be black are black and the areas you want to be white are white. There are no hard rules for the numbers, just make it so you like it and hit OK. What you have now should be pretty decent but rather stark. Behold:
If you wanted, you could maybe color this as if it were a comic illustration, or you could leave it as it is. There is not a whole lot of shading, however, so if you want to take it a step further, read on. We’re going to duplicate the background layer again—that would be the layer in which the original photo lies—and we’re going to place that new layer at the very top, like so:
We won’t need to work in high resolution any more, so go to Image Size and slug in the number you originally had in there—i.e., before you changed it:
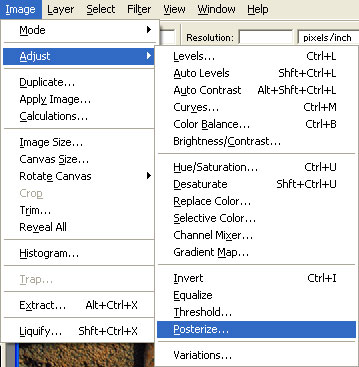
Next, make sure you’re on the new topmost layer, and Posterize that baby, like so:
The number of levels is up to you.
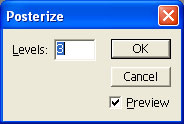
Me, I’ve opted for three levels, though anywhere between 3-5 can work. This posterizing step really isn’t all that necessary, but I happen to like the results better when this step is included. It limits the number of colors in the image and therefore clearly defines areas of contrast and gives it a more directed and illustrated look, which in turn makes the next step even more effective.
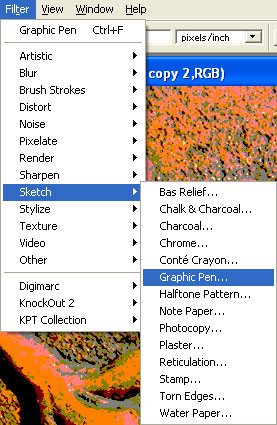
The next step? Graphic Pen.
Here are my settings:
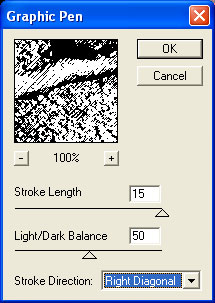
Note that I have it set to Right Diagonal … because we will repeat these last few steps later and set it to Left Diagonal. But first, set this top layer to Mulitply, like so:
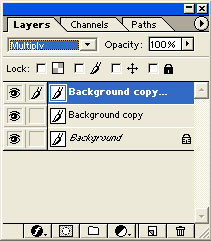
Okay, NOW repeat the last few steps. Duplicate the photo layer and place it at the top. Posterize that baby, and select Graphic Pen, set to Left Diagonal. Then set that newest top layer to Multiply as well.
You should have something like this by now:
Voila. Looks like a much better defined line art now, doesn’t it? With more depth? See? I told you so. I’d say you’re done. 🙂
As promised, this post did a trick. 😉
Share this post:
4 thoughts on “Photoshop Tips and Tricks #5: Turning Photos into Line Art”
I’m waiting for the tricks!
Can it walk the dog or go round the world? What about jacob’s ladder?
Okeedoke! The trick is up. 🙂
SOOO cool! Us muggles are unworthy!!
Comments are closed.