How To Make Celtic Knots in Illustrator
If you have Adobe Illustrator, and you liked How to Make Celtic Knots, the Quick and Easy Way, you might like this mini-tutorial. You will be amazed at how ridiculously easy it was to make the knots I previously posted here and there, and I will totally regret having given away this secret technique of mine.
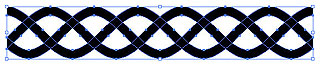
Step One: Using the Pen tool, draw the paths that will make up the various threads in your Celtic knots and give them a stroke width of about 10 or 20 points.

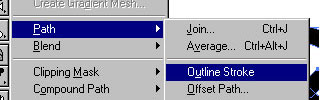
Step Two: Once you have created your weave of knots with paths, select Object > Path > Outline Stroke to turn them into shapes.
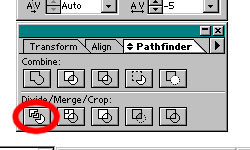
Step Three: Select all the shapes and, using the Pathfinder tool, Divide them. At this time, you may want to give the shapes a stroke of another color and perhaps a width of about 2 points to help you see each “object” in the image.

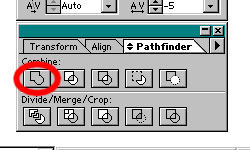
Step Four: Using the Direct Selection tool (that would be the white arrow), select the three objects that make up any part of a thread that goes “over” another one. Then use the Pathfinder tool to Combine them.

Step Five: Use a radial gradient as Fill to give your finished image a 3D look, and voilà! You’re done.

See how easy that was? I will hate myself in the morning for sharing my special trick.
Share this post: